Configuring the EntraID Application
You can manage user authentication for the Portal directly from your Active Directory EntraID.
-
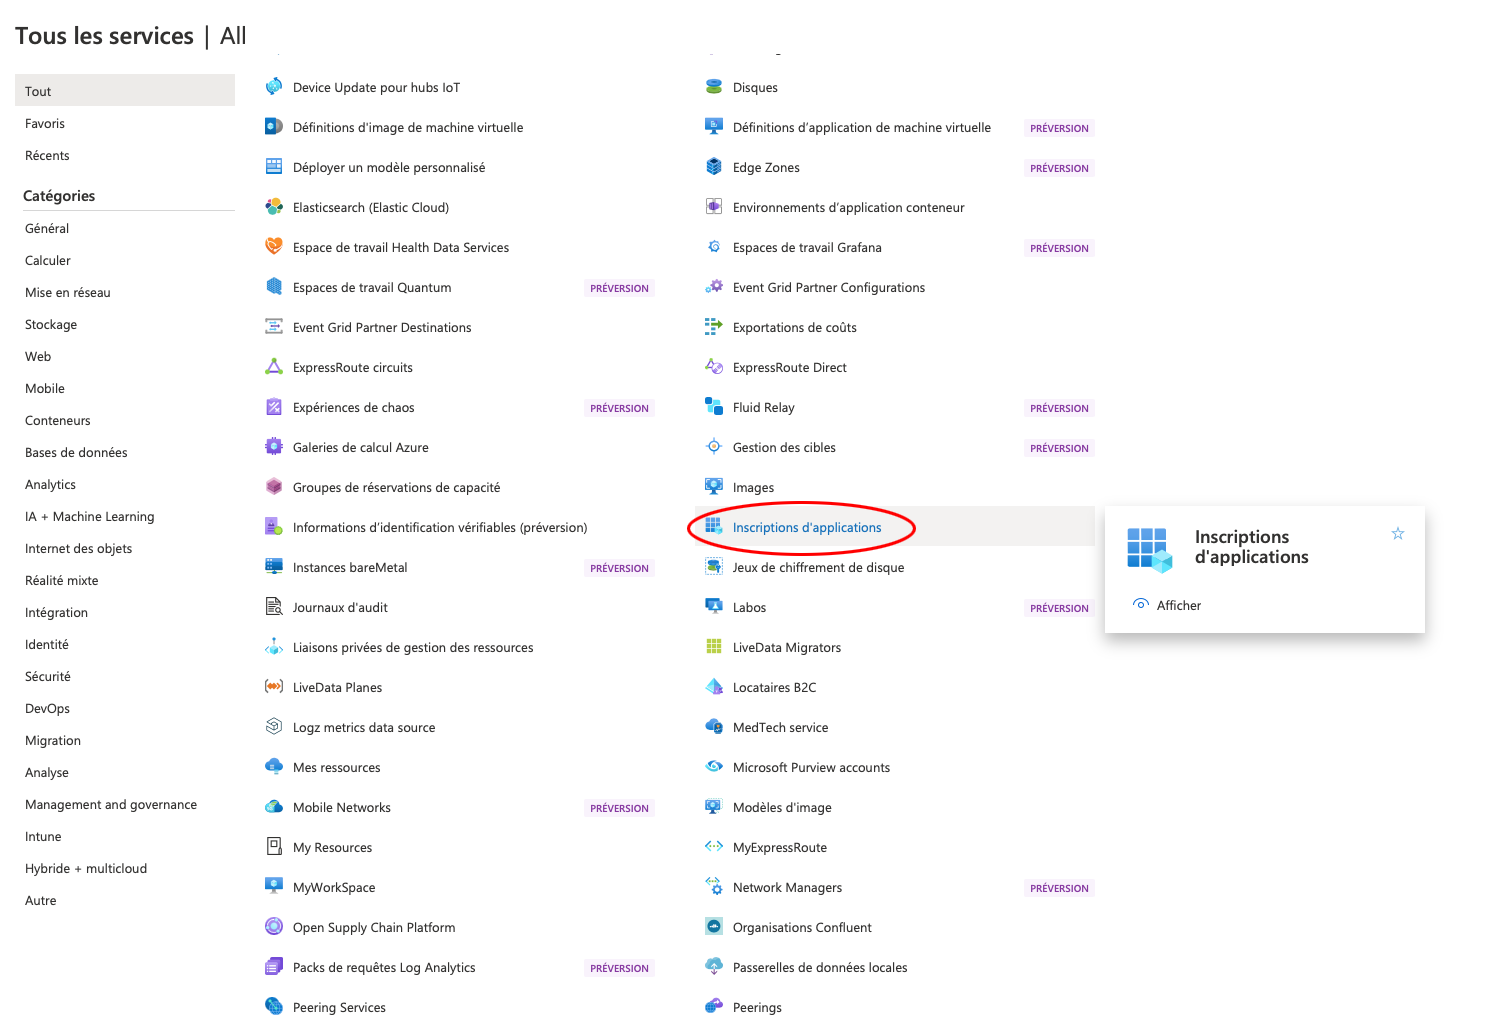
From the Azure Portal home page, go to "Other Services" and then select "Application Registrations":
-
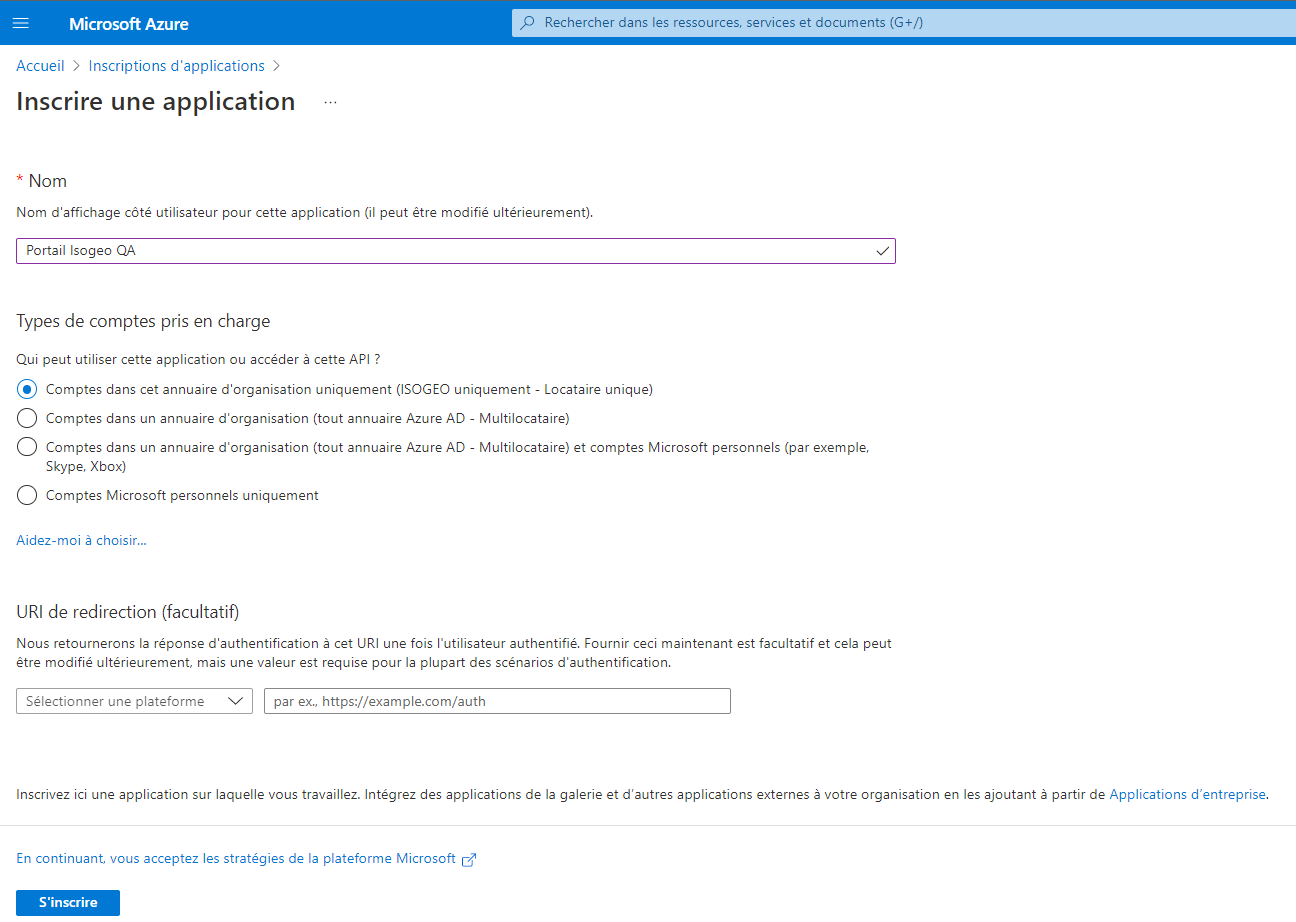
Register a new application using the configuration below
-
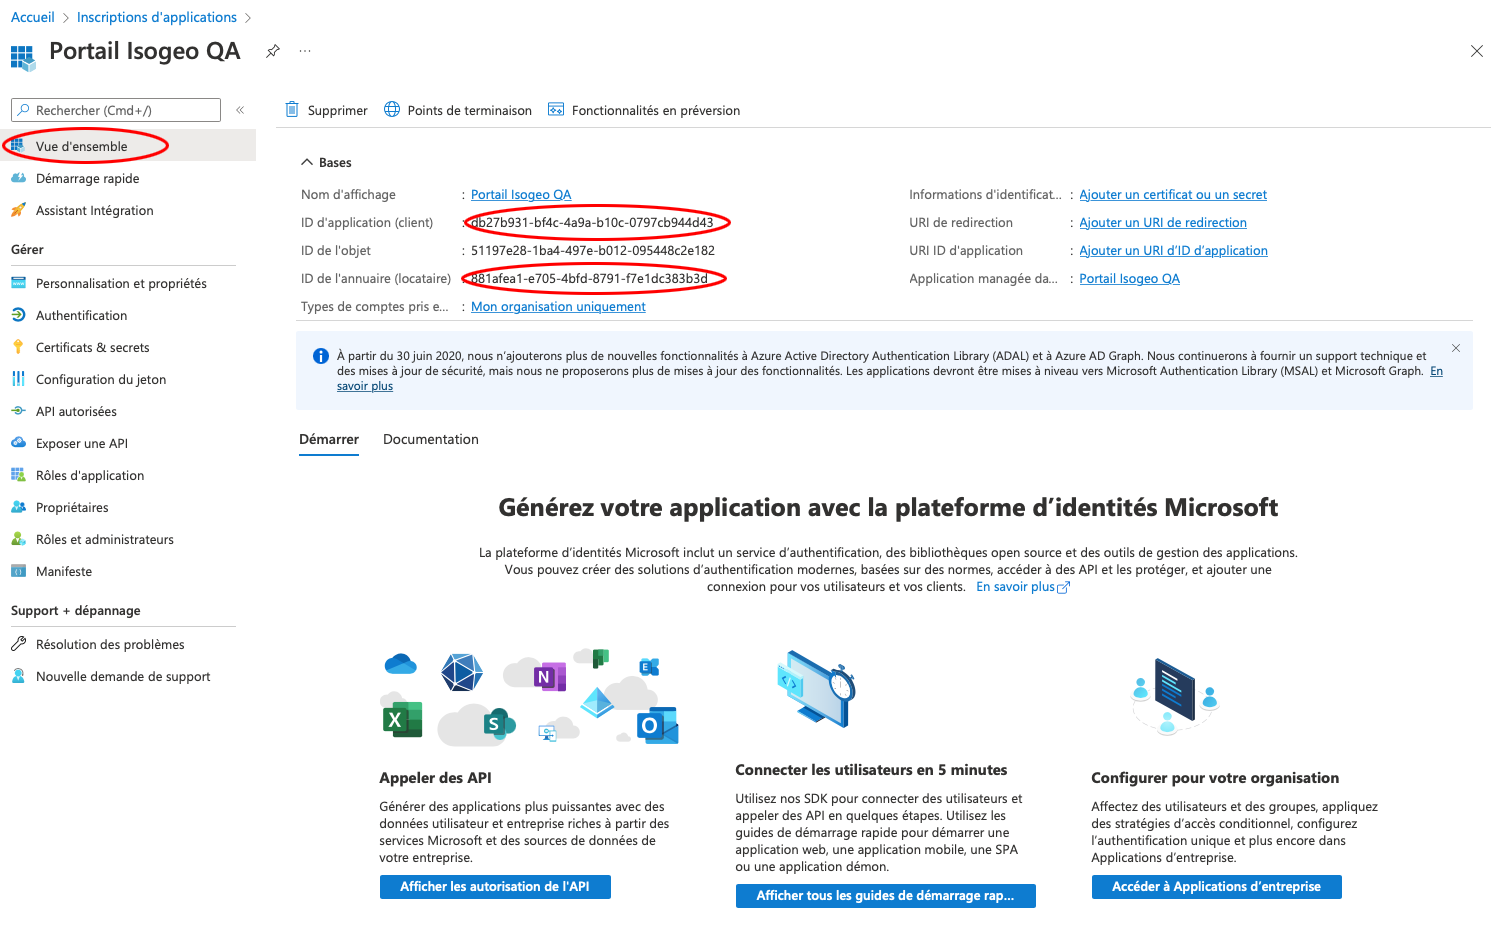
Gather the following information:
- Application ID (sometimes called "client ID")
- Directory ID (sometimes called a "tenant")
-
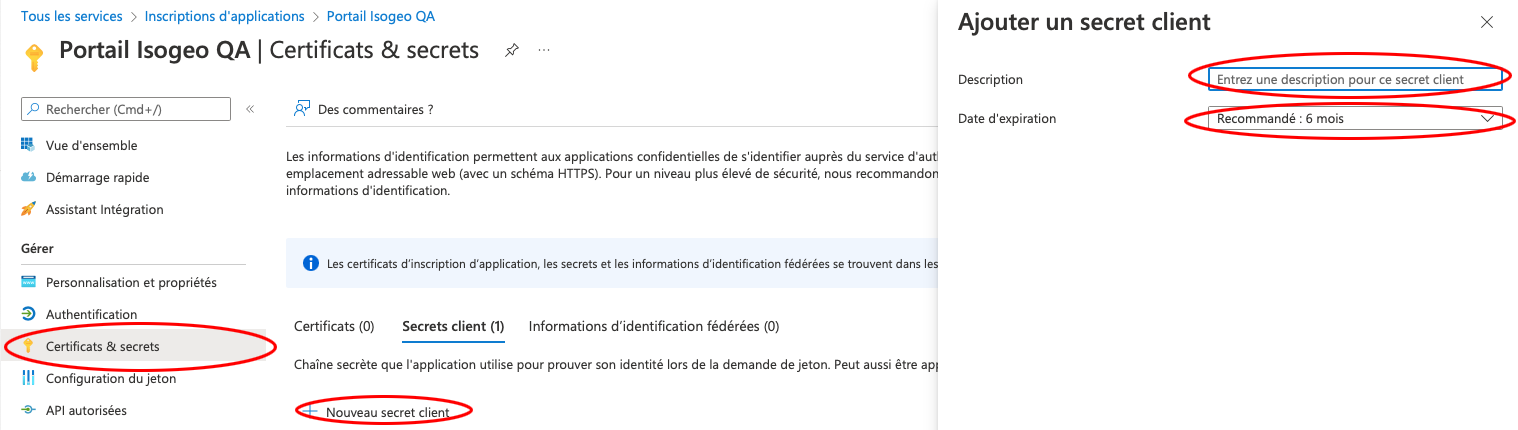
Create a new client secret in the Certificates & Secrets menu:
Warning
This element can only be read and copied/pasted immediately after it is created. It cannot be retrieved afterward; the only solution is to create a new client secret.
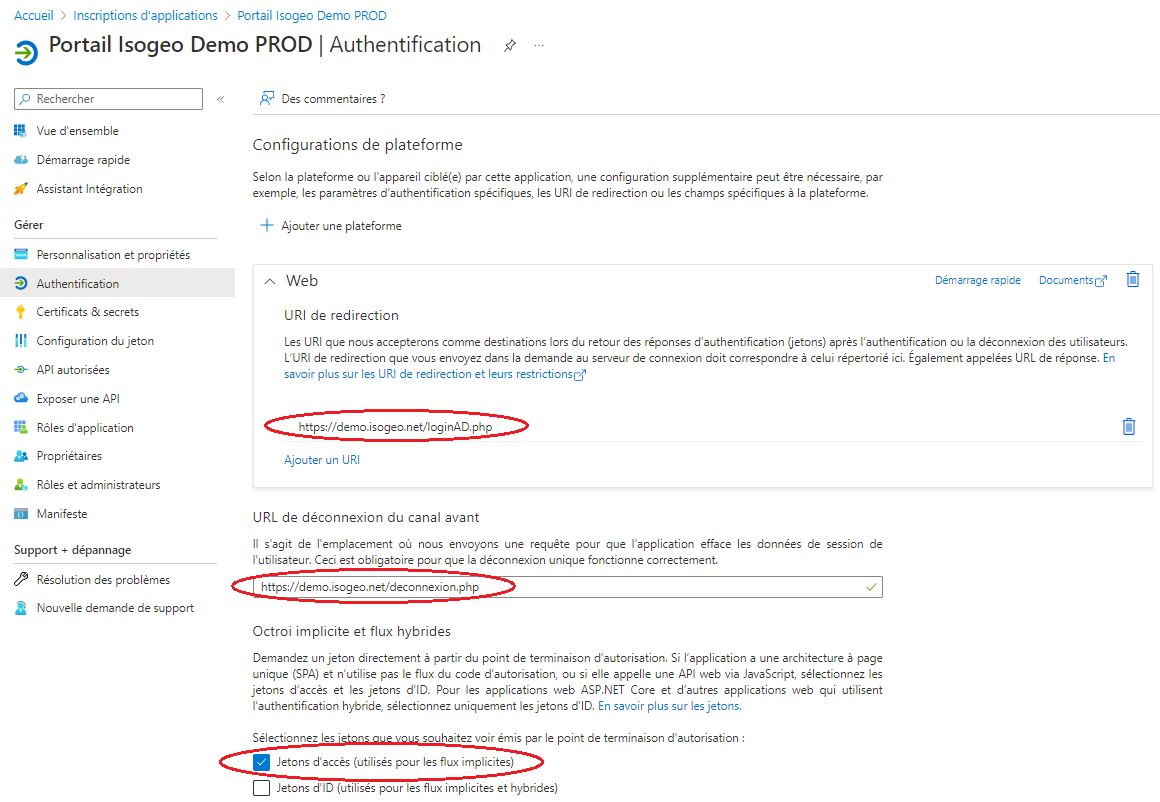
- Open the Authentication menu
- Add a web-based platform
- Enter the login and logout URLs and check the "
Access tokens" box(used for implicit flows):
-
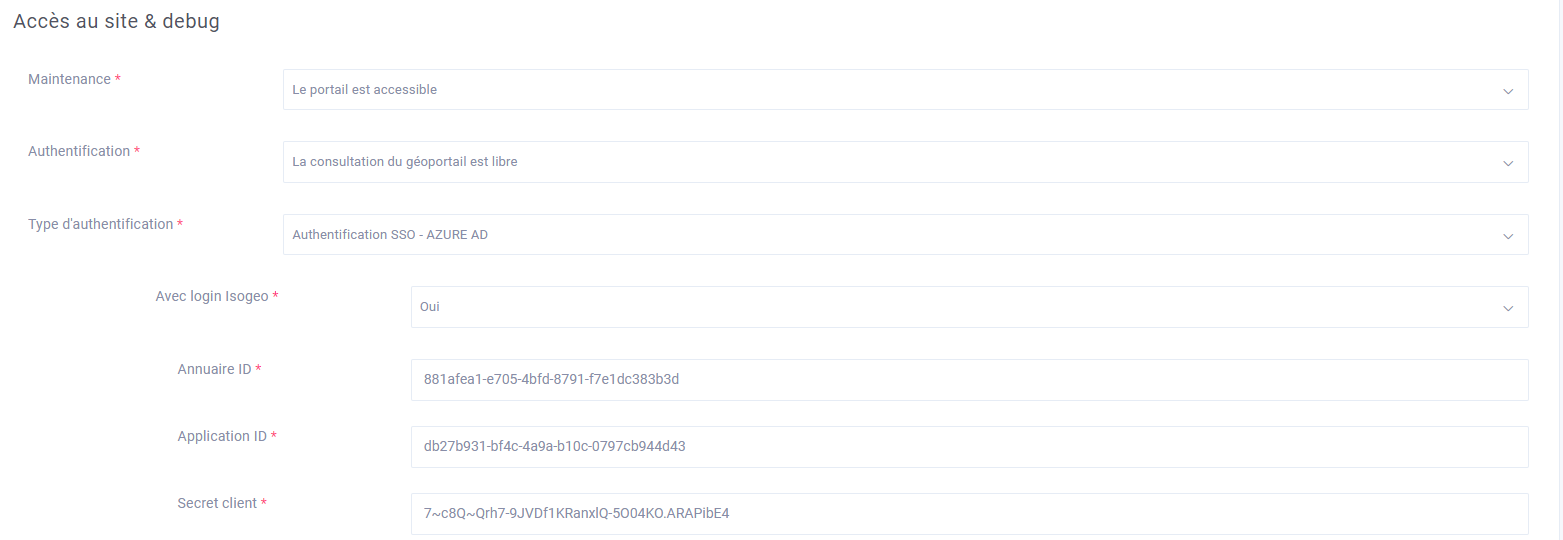
Enter the retrieved information (Directory ID, Application ID, and Client Secret) in the Portal's general settings by selecting the Azure AD authentication type
 You can also choose to keep the Portal's native authentication system. Both options will then be available on the front end.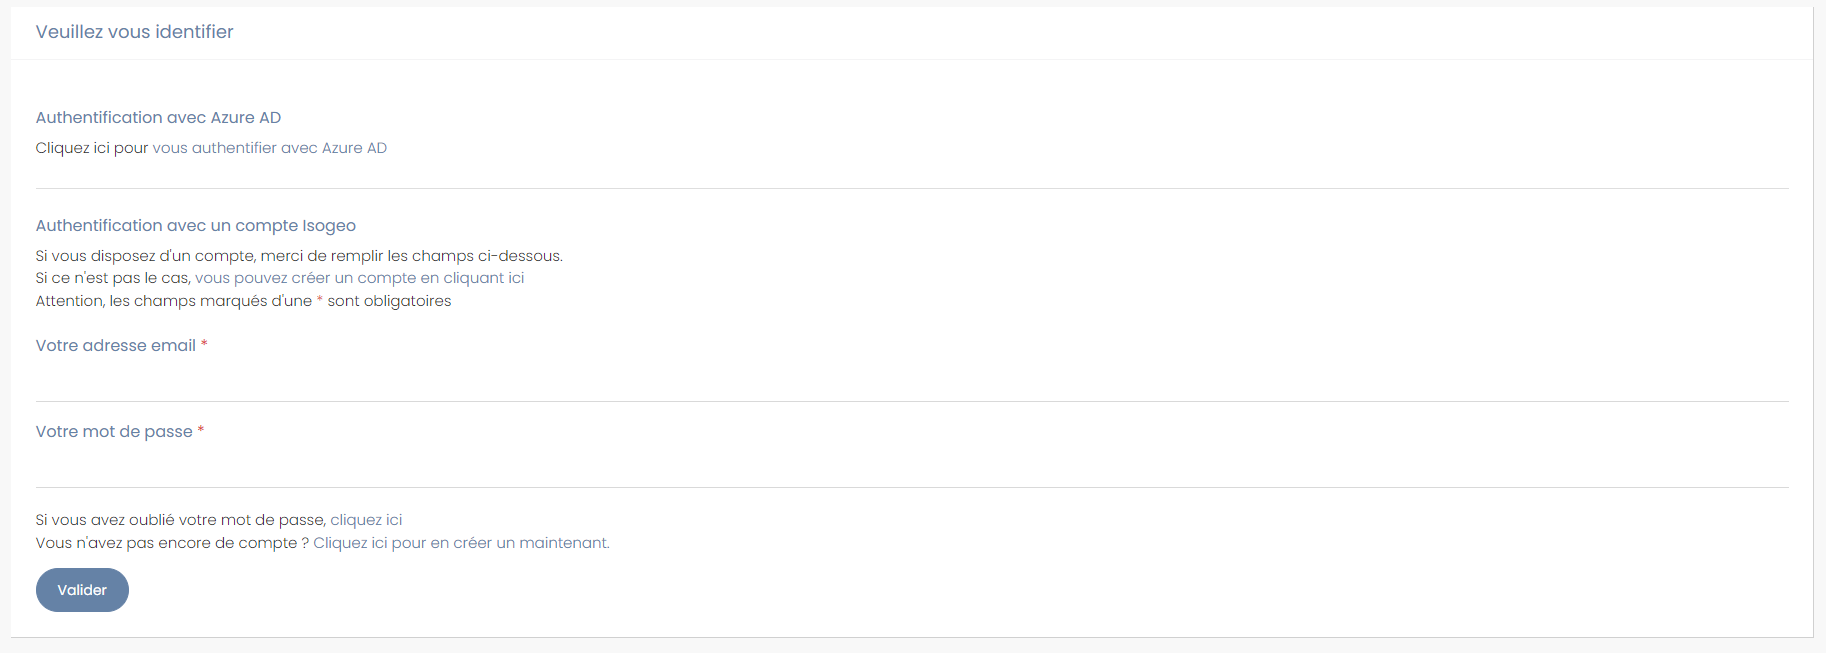
-
In order for the token to be activated and for all users to be able to sign in, an Azure AD administrator must sign in to the Portal for the first time.