Add the Widget to an Experience Builder application
- Log on to Portal as administrator ;
- Go to the
Contenttab; - Creating an
Experience Builderapplication ; - Select a model (we recommend the
Option Boxtemplate and replacing theListWidget on the left with the Isogeo Widget) ; - Add the Isogeo widget from the
Insert a Widgetmenu in theCustomsection;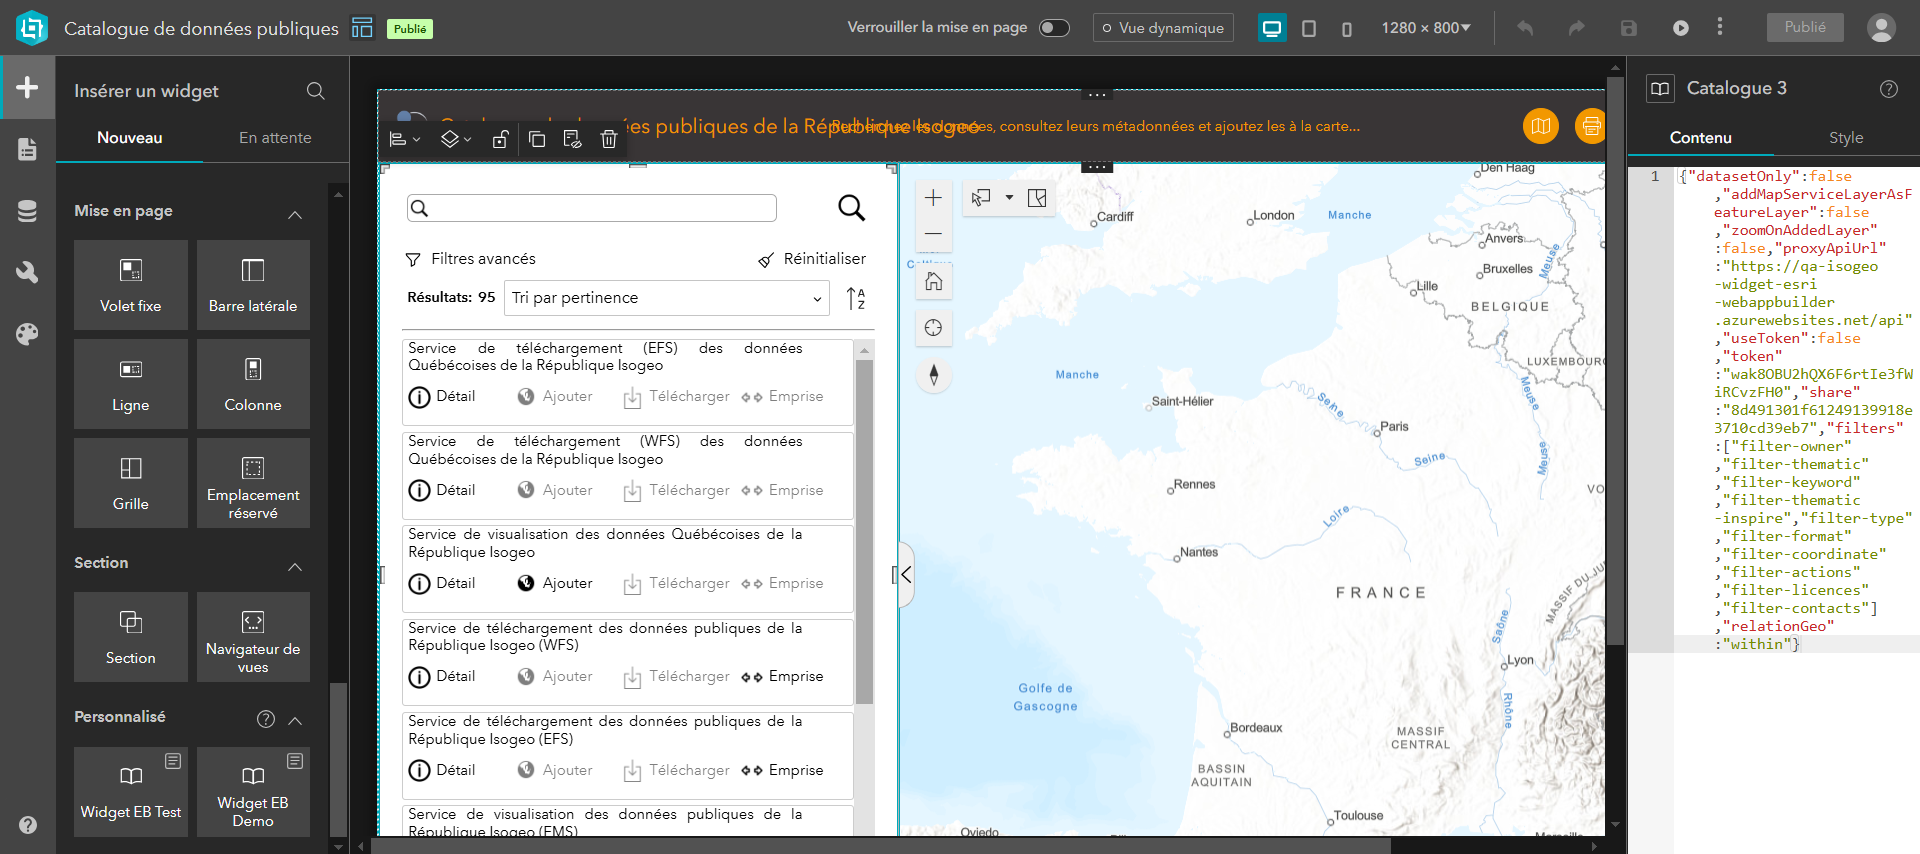
- The widget configuration file can be edited directly from the Portal interface. The configuration will only apply to the application (see Other possible configurations).
Warning
To add the Widget to an Experience Builder application, a map must already be integrated into the application beforehand. Otherwise, it will not load.
Other possible configurations
You can also modify the following parameters:
dataset-only: If this parameter is set totrue, only non-geographic raster, vector and tabular records will be proposed. Otherwise, service and resource records will also be proposed in the searchaddMapServiceLayerAsFeatureLayer: Add data to the map as a service or as a layer. In the first case, the entire Map Service is added to the map when a layer is added. This makes it possible to display certain symbologies that are not displayed in FeatureLayer.zoomOnAddedLayer: Zoom the map to the service layer's footprint after it has been added.proxyApiUrl: Url of the proxy managing calls to the Isogeo API (reserved for the Isogeo team)useToken:- If set to
true, the Widget will connect to the proxy using the share identifier and token indicated in the manifest url. - Otherwise, it will call the proxy using the share identifier and token configured just below.
- If set to
share: share identifier for local installationtoken: security token identifier for local installationfilters: Whether or not to display the advanced filters belowfilter-owner: Display filter on ownerfilter-thematic: Display filter on themesfilter-keyword: Display filter on keywordsfilter-thematic-inspire: Display filter on Inspire themesfilter-type: Display filter on resource typefilter-format: Display filter on formatsfilter-coordinates: Display filter on map extentfilter-actions: Display filter on possible actions (View, Download or Other)filter-licences: Display filter on licensesfilter-contacts: Display filter on contacts
multifilters: Whether or not to enable multiple-item selection for the filters belowfilter-thematic: Enable multiple selection on themesfilter-keyword: Enable multiple selection on keywordsfilter-thematic-inspire: Enable multiple selection on Inspire themesfilter-actions: Enable multiple selection on possible actions (View, Download or Other)filter-licences: Enable multiple selection on licensesfilter-contacts: Enable multiple selection on contacts
relationGeo: geometric parameter for right-of-way searches sent to the Isogeo API (reserved for the Isogeo team)Intersects: The data touches the map in some way (default value)Contains: The data encompasses the entire map.Disjoint: The data is completely outside the map.Equals: The data's extent exactly matches the map's.Overlaps: The data partially overlaps the map.Within: The data fits entirely within the map.
layerSelectionEnabled: Whether or not to display the layer selection window when several service layers are associated with the data. If not, the following priority applies:- EMS (if several, the first associated layer is added to the map)
- EFS (idem)
- WMS (idem)
Note
For your information, the portal will automatically load the configuration entered in the catalog/config.json file each time the widget is added to a new Experience Builder application. In an existing application, check that the user has not modified the widget configuration.
Add icon to Widget controller
If you want to add the Widget to the Experience Builder controller widget, you'll need to add a PNG-format icon. To do this :
- Open the PNG icon at this link, then right-click, save image as.
- Click on the Catalog icon which is not displayed in the controller.
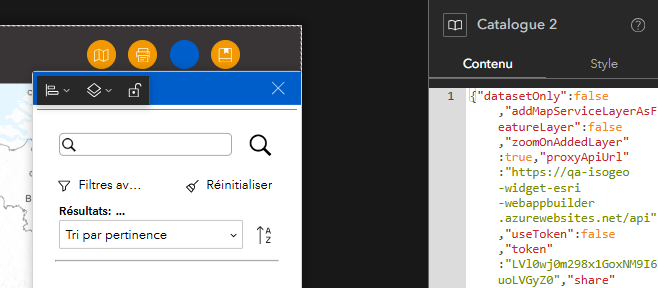
- Click on the Catalog icon.
- In
My icons, click on the+. - Import icon as PNG.